VMD: VMD can be found at this link. Choose the latest version (currently 1.9.4). You must choose your operating system, and register your email address. This is an academic site so your email won’t end up in any spam lists. Install it by following the directions. When you open it for the first time, you will get a warning from OSX that it is from an unknown developer. Open System Preferences -> Security and Privacy, and a box should be there which will allow you to open VMD. You will need to enter your password.
NAMD: NAMD can be found at this link. Again, choose the latest version (2.13). Your email address/password from the VMD step can be used here, also. You should put this in your "Applications" folder and rename the folder "NAMD" (removing everything after the first four characters). Again, you may need to enter your password to move NAMD to Applications.
Packmol: We will use the 'packmol' program later on in the semester. Save this file to your computer — the best place is the previously mentioned "bin" directory. You should be able to do this by right-clicking the link with your mouse, or
(You should be able to access these files individually under the "Files" tab on the right of the page(s), too.)
CONVENTION: In the Laboratory pages, things you will have to type in the terminal, tkcon, or into a VMD input box are in RED. Example output from the terminal, tkcon or vmd are in BLUE. Menu and other descriptions are in GREEN.
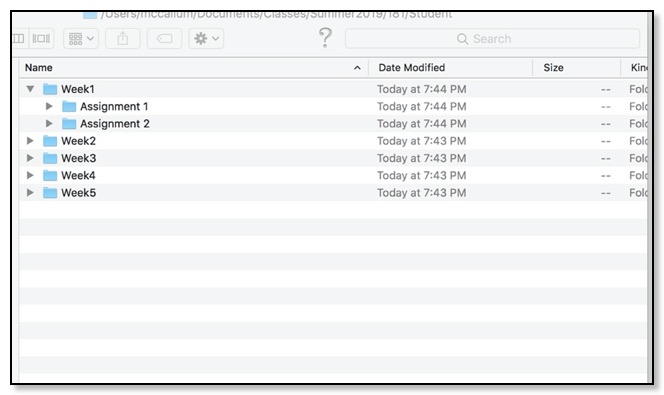
Students should organize their files. Here is the suggested file structure:
Introduction to VMD
In this lecture we will learn how to use VMD, a powerful and free molecular visualization program available from the folks at Theoretical and Computational Biophysics Group at UIUC. There are many tutorials and user guides out there (see this link, and this link, for example), from which I'm borrowing heavily. THIS LECTURE ASSUMES YOU HAVE DOWNLOADED ALL OF FILESET1!
The goals of this segment of the class are to enable you to render nice representations of your molecular systems, pull Protein Data Bank files off the Internet and see them quickly, and begin to understand structure and function through the visualization tools.
VMD will open a number of windows,and it will look something like this:
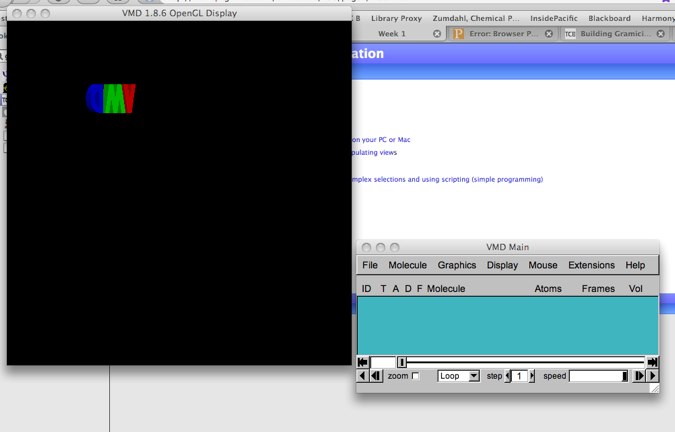
Figure 1: VMD running on a OS X machine.
Locate the VMD main window. Go ahead and examine some of the menus. In the following, text you can type into a VMD form is blue . VMD menu selections are green. Filenames are typewriter text.
Molecular visualization examples
Double-stranded DNA
To begin, let's load a relatively well-known molecule: a strand of DNA
(this has the ascession code ‘103d’ from the RCSB/Protein Data Bank, which we will investigate later). This file is located in the first set of class files. You should have downloaded these files already; if you have not, take the time now to do that. Finished with that? Then use the ``Browse'' button; A file browser will pop up. Browse to your directory and find the file. You may want to pull down the Favorites menu and select ‘Add to Favorites’. The next time you want to grab a file from this location, you may use the Favorites menu to immediately select this directory.
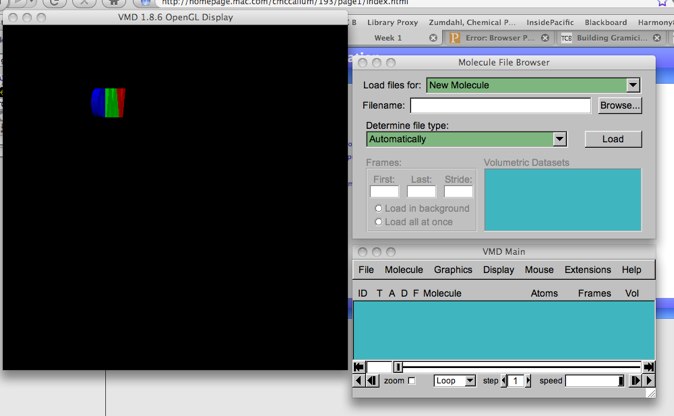
Figure 2: The file menus in VMD
Now select the file ‘103d.pdb’ in the browser and click ``OK''. The recognizable form of a double-stranded DNA should show up on your screen. The default way to display molecules in VMD is the “lines” representation. Pull down the “Graphics.. -> Representations” menu item. You will see this:
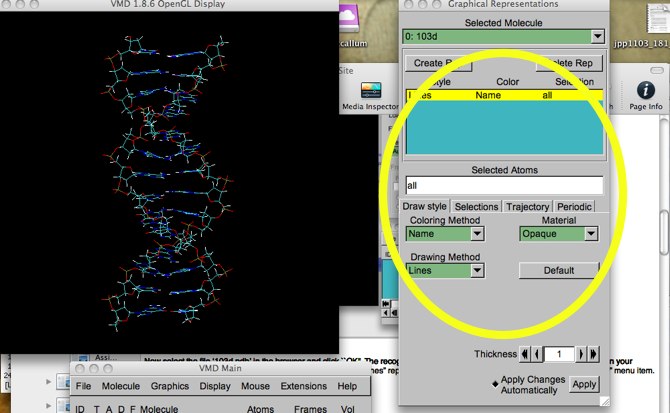 Figure 3: The Graphical Representation menu.
(An aside: if you have NOT downloaded the files mentioned above, and naively type "103d" into the Filename form, it WILL still load the molecule. In this way, you might think you loaded your file, even though you really didn't. How come? Well, it turns out that typing in the RCSB Accession code causes VMD to go out to the RCSB website and grab the appropriate structure. This can also be done in the tkconsole using 'mol pdbload CODE', as we will see later.)
The circled area shows what we are concerned with now. The “Lines” drawing style, with (atom) coloring by atom “Name” has been applied to “all” atoms (the default manner) in 103d.
Different ways to display molecules are called representations in VMD. Atom coloring by type is pretty standard, in other words, red=oxygen, white=hydrogen, cyan=carbon, etc. Lines are the default as it is the simplest for a display to render. Use the mouse to move the molecule. Left-click and move the mouse around. This gives you xy-rotation. To z-rotate, hold down the middle button while you move.
You can also scale and translate the molecule. To scale, put the cursor in the display window and hit the 's' key. Now left-clicking and moving the mouse will zoom the molecule in-and-out. To translate, hit the 't' key while the cursor is in the display window. Now you can move the molecule around the window. To return to rotation mode, hit 'r'. If your molecule has gotten messed up, and you want to re-center it, choose the Reset View option under the Display menu option (VMD Main window).
Other rendering techniques can be chosen also. To see some of them, pull down “Graphics ... Representations”. The Representations window will come up. For now, let's just explore some of the ways to render our DNA. Locate the Coloring method and Drawing method pull-downs. Under Drawing method there are many choices such as Points, VDW, (van der Waals spheres), CPK, (ball-and-stick), and licorice (sticks). Some of the others are not applicable for this molecule, by the way. Go ahead and play with some of these. Notice that the more complicated the render, the less responsive the display becomes. Remember this -- always set up a view using lines before choosing a more computationally-intensive render. On these types of renders, you can also experiment with line thickness and so on, as well as resolution. HINT: set up a picture that you want to save to high-resolution at a low resolution and/or rendering style (such as “lines”) BEFORE you raise the resolution.
Here is an example of how a high-resolution render of our 103d looks in VMD. Notice the settings used (yellow circles) --- the “Material” setting can be fun to play with.
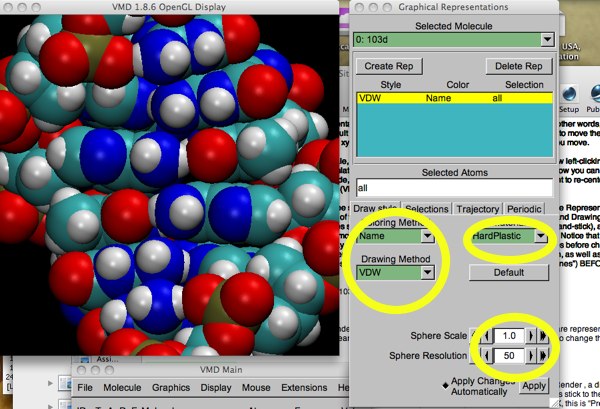
Figure 5: high-res 103d.
Now try ribbons or new ribbons . This is a common render, and it ``knows'' about DNA. Notice how the side chains are represented. You can use the resolution control to make the render appear less jagged. You can also play with the “Coloring method” to change that information.
Molecule display attributes
If you examine the VMD Main menu, you will see it has an ID (the ‘molid’ - a number), and four letters: T A D F. These four letters are toggles. “T” stands for “top”, the top molecule - if you have more than one molecule loaded, you can think of them in a stack. If the molecule is not the top molecule, this “T” does not appear.
Molecules can be active or inactive. If inactive, mouse operations (and scripting commands) do not act on them. The active molecule in a stack has the “A” in black; it is magenta if the molecule is not active. Double-click the “A” to toggle between active or inactive.
Molecules can be hidden also -- this is the “D” toggle. Double-clicking on the “D” changes it’s color to magenta and hides the molecule from the display. Molecules will still rotate and suffer actions if they are hidden by this toggle (unless the other toggles change that).
Molecules may or may not be fixed. This is the “F” toggle. “Off” means “unfixed”, thus magenta is the default, unfixed state. While the molecule is unfixed --- black “F” --- it will not rotate, translate or swivel. “A” is all-or-nothing, but “D” and “F” allow some control.
Finally, back to the molid. This is useful to use during scripting when reference to a numeric is easier than finding a name, etc. All of these attributes will be used to greater effect when we engage in complex scripting and or load multiple molecules.
Making a graphics image
You can save any view that you have created in VMD with the File ... Render command (main menu). If you select Render , a dialog will open, allowing you to choose the name (and path) of the file, along with many choices of rendering methods. For now, let's stick to the default (“Snapshot”). Clicking OK will do two things: create a .tga (Targa) file, and open that file in your default picture viewer (under OS X, this is “Preview”). The viewer will allow you to save the image in a more convenient format, such as TIFF, jpg, png, or gif. Click on ``save'', and a save dialog will pop up allowing you to save your file in whichever format you like.
VMD allows you to render different parts of your system differently. You may wish to render a protein reaction center in detail, with the rest of the protein rendered in some symbolic fashion such as ribbons. Or you may wish to make a transparent molecular surface, showing the backbone structure of the molecule inside.
Here is my result of the above 103d render, saved as a jpeg:
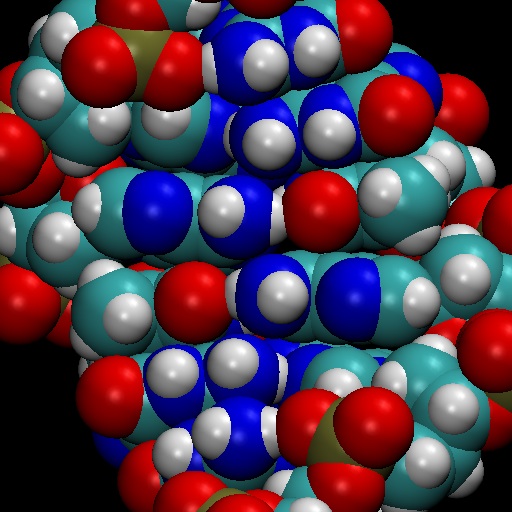
Figure 6: JPEG of the high-res 103d render.
As you learn more about VMD, and some of the programs you can use with VMD, you can create some truly stunning molecular renders:
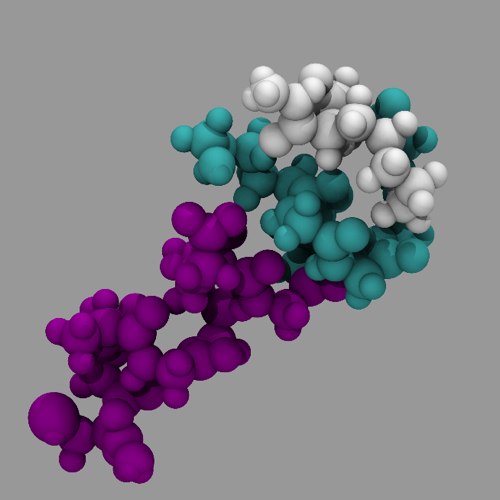
Figure 7: A more complex molecular render (20 minutes on a MacBookPro).
Saving your work!
Aha! Very important. You can save a VMD file which will reload your molecule and all your settings (assuming that you don’t move the files). Use “File... Save State” on the main VMD menu for this, and keep the suffix .vmd. Browse to your Project directory, and save a state or two. Convince yourself all is OK by deleting the molecule (highlight the molecule line in the main VMD menu, and select “Molecule... delete”), and reloading your state (“File... load state”).
For the next step, clear the DNA molecule from the display. Highlight the name in the Main VMD window, and right-click. Select Delete Molecule to clear it.
A solvated micelle
Find the file “dyn_mic4_box_120ps.pdb'' from File Set 1 and load it. If you read the logged text in the VMD console window, you will see this system has over 15,000 atoms. It is a small lipid micelle system containing sodium dodecyl sulfate ionic surfactants, sodium counter ions, and a cubic box of water around the micelle. This system is a great example for showing how different representations may be used in VMD. Because it is so large, however, it will make your VMD struggle to rotate and scale if you make your rendered image too complex.
Open up the Representations window if it isn't already. Notice that the window has a Selected Atoms form which says all . In other words, VMD has automatically created a default selection containing all the atoms. all is an example of a selection keyword. Others include residue names and numbers, atom names, more generally defined things such as backbone (the carbon-nitrogen backbone of a peptide), et cetera. You may see what current selections are valid by clicking on the Selections tab. The list changes with each system you load, listing the valid atom types, residues, etc. in that system.
You can tell there is a ball of something in the cubic box of water, but it is hard to see. Let's select the water, then turn it off. First, hit the Create Rep button. Another “all” representation is created. Now enter ' resname TIP3 ' (no quotes) in the atom selection box (TIP3 is a water model commonly used in molecular dynamics simulations.). This new representation is changed. In the upper blue box, double-click the TIP3 representation to turn it off. If you now click on the other representations (the remaining “all” one), you will notice that the text color of your TIP3 representation has changed, indicating that it is “off”.
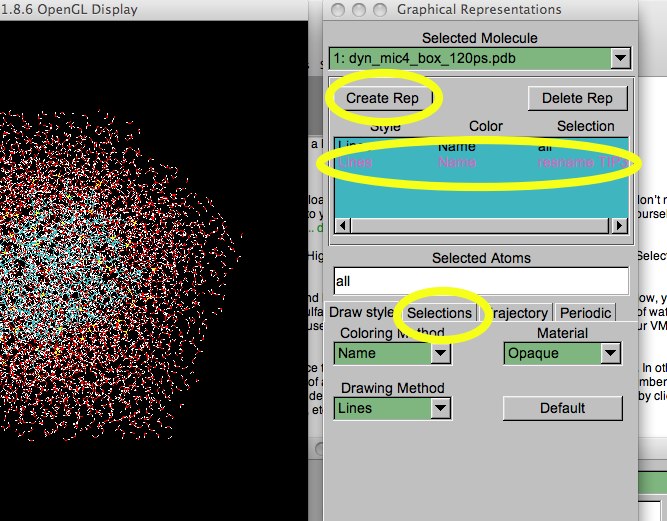
Figure 8. Adding a TIP3 representation.
Now, click on the “all” selection. Change the “all” to ‘not resname TIP3’ (in other words, all atoms that aren't part of a TIP3). The water molecules should disappear, now that the TIP3 selection is off, and the other selection is no longer “all” . You've just successfully made your first useful selection!
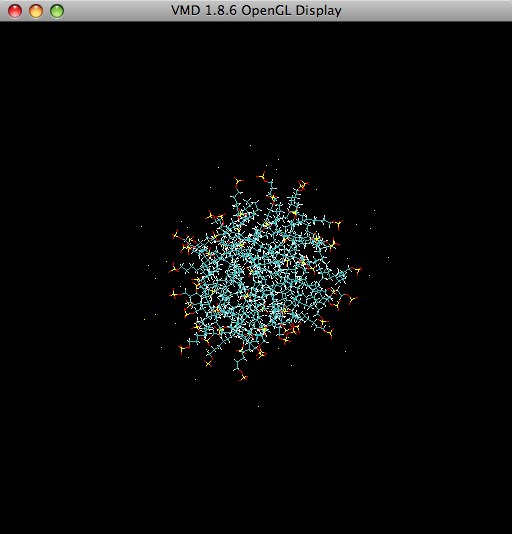
Figure 9: A micelle of SDS, sans water. Note the sodium ions (dots).
It might be convenient to separate the SDS molecules from the sodium ions. Change the previous selection to ‘name SOD’ (you could have found out that SOD is the name for sodium ion by looking under the Selections tab). Now only the sodium ions (yellow dots) should remain. Now, create a new selection for the SDS molecules (SDS is not an atom/ion. What is the proper selection ID to use?). These are relatively simple examples, but you can begin to see how more complex selections can be made.
Each selection may have its own rendering type. For example, you can render the sodium ions as van der Waals spheres, the SDS as licorice, and the TIP3/water as transparent CPK (although leaving the water molecules in make it very hard to see anything else).
There is another way to make selections by using the tkcon (tk terminal) and the tcl scripting language. We will use the tkcon in the next example, although we won't begin to explore its full potential until an upcoming session.
A word about selections...
Selections are very important to understand. Here is a quick list:
- molecule: the whole file loaded into VMD. This can represent multiple copies of the same molecule (for example, after completeing the next section, load 1sse from the Protein Data Bank).
- name: what we normally think of as an atom, but includes both the element name, and the name of that type of element as represented in the coordinate files. For example ‘name C’ would include all carbon atoms in the molecule, while ‘name CA’ would include only alpha-carbons.
- resname: the name of a single amino acid type (CYS, ALA, GLU, etc)
- segname: large proteins are often broken up into segments. Experiment with with this selection on a larger protein to see how this might occur.
- residue: (different from ‘resname’): the sequence number of the amino acid in the protein. (I always want to call this “resno” for “residue number”.)
- chain: similar to ‘segid’ or ‘segname’
Off-site loading
What if you want to visualize a known crystal structure, but you don't happen to have the coordinate file on a local machine? There is the RCSB Protein Data Bank, of course. You can go there, find the structure, download it, and load it into VMD. Or, you can let VMD do it for you. There are two ways to do this, from the File...New Molecule menu (as mentioned above), or from the tkcon (console), which we will do now.
Under VMD's main menu, pull down Extensions ... tkcon . A normal-looking terminal window will pop up; this one happens to run the tcl shell. It is similar to tcsh, including recalling old commands with the up-arrow key and so on. To begin, type ‘mol delete all’ in the tkcon . This is the tkcon command to delete all molecules from the viewer. Notice that all references to the micelle system are gone from all the menus.
Now enter ‘mol pdbload 1s5l’. This will load the 1s5l system from a past Protein Data Bank Molecule of the Month. From the description:
Modern cells capture light using photosystem proteins, such as the one pictured here from PDB entry 1s5l. These photosystems use a collection of highly-colored molecules to capture light. These light-absorbing molecules include green chlorophylls, which are composed of a flat organic molecule surrounding a magnesium ion, and orange carotenoids, which have a long string of carbon-carbon double bonds. These molecules absorb light and use it to energize electrons. The high-energy electrons are then harnessed to power the cell.
If you would like to investigate and/or highlight the pertinent reaction center of this molecule, here is a link.
Of course, if you want to grab coordinate files from the Protein Data Bank like this, you must know something about the structure that you want to load (protein name, researcher, four-letter code, etc).
Leucine Zipper
As a final example, let's examine the so-called leucine zipper. This structure is taken from a tutorial; you may wish to revisit this site later on in the semester.
Delete any molecules you have loaded into VMD. Load the file 1pgb.pdb from the File Set 1. In this particular structure, the water residues are called HOH. One of the more interesting representations available is the cartoon/new cartoon renders. Select all non-water residues and use the cartoon and the structure Coloring Method to draw the leucine zipper. Is there anything about this protein that you find interesting? Something seems to be missing….
